My first game of Frostgrave (paid link) is tonight, so over the weekend I spent some time setting up a sample city — “my” Frostgrave. I’ve done proofs of concept before (most of which resulted in buying more terrain), but this is the first version I really like.
I spent a lot of time researching terrain and looking at other folks’ takes on Frostgrave, and I often wished they’d break things down a bit more. This post is my answer to that wish: Along with pictures of the finished city, I’ll share my goals and list everything that went into my version of Frostgrave.
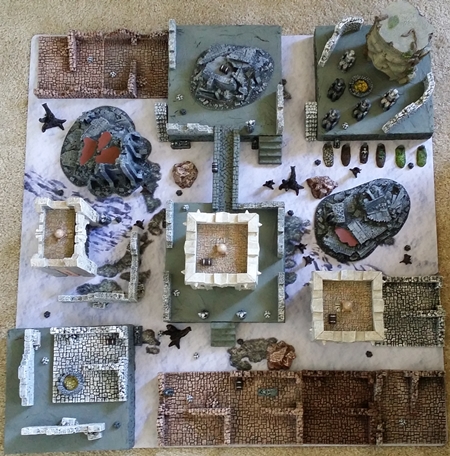
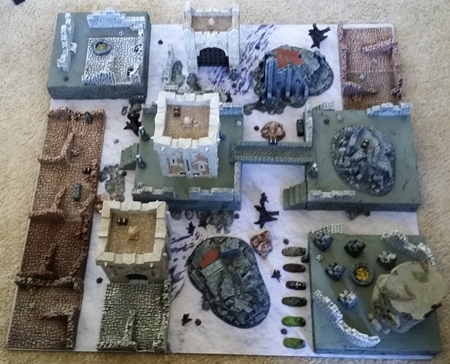
(Here’s a larger version of this top-down view.)
Goals
Here’s what I had in mind when buying and setting up my city of Frostgrave:
- Don’t paint or build anything. I don’t really enjoy painting minis, and I have no interest in painting or making terrain.
- Make it look as good as I can. I tried to get the most bang for my buck with every terrain element.
- It should be crowded. Per the rules, line of sight should never exceed 24″ (and should usually be a lot less). It’s a knife fight in a phone booth, not a battle in an open field. I’ve seen some otherwise gorgeous setups that have lots of wide-open spaces in them, and to me that isn’t Frostgrave.
- Incorporate elevation. Everything in Frostgrave can be scaled by default, and elevation is fun.
- Make it feel real. Real ruins are cluttered (and some Frostgrave tables looks too clean and tidy to me), so I added clutter. Real cities are rarely just one color, so my Frostgrave isn’t mono-colored either. A city full of undead servants and crazy wizards, like Frostgrave before the big freeze, would have a death motif, so I added one. It would also be a weird place, so I tried to make it feel weird.
- Keep it portable. Except for the battle mat, it all fits in a plastic storage box.
The other parts of the equation are miniatures and storage, which I’ve written about on Yore in the lead-up to this post:
- Here’s my Frostgrave storage box (paid link) and the associated blog post.
- I use Pathfinder Pawns (paid link) instead of minis; here are all of my posts about using Pathfinder Pawns. Those go in a Plano box (paid link), plus a baggie for monsters (more details here), which also fits inside the big tub.
My Frostgrave
I took photos of the city from all four sides, and then took a few “in-the-streets”-style shots to round things out. Weird factoid: I don’t own a table large enough for Frostgrave (although our coffee table is close), hence the carpet.
From all four sides
First view (larger version):
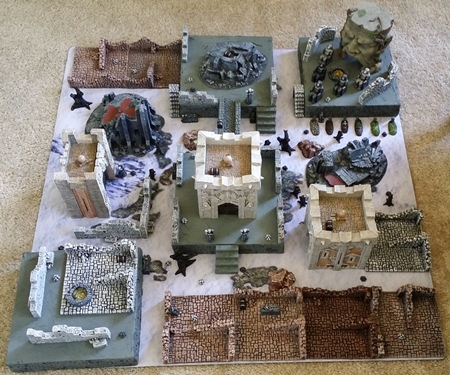
Second view (larger version):
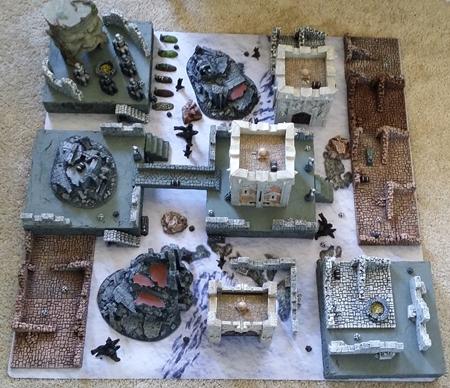
Third view (larger version):
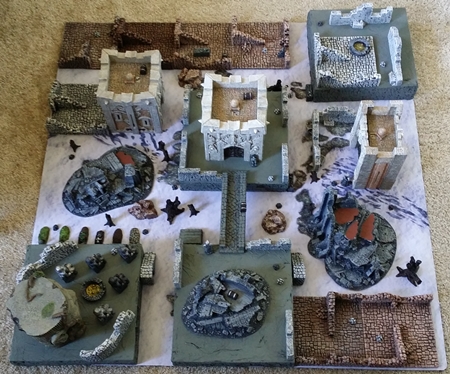
Fourth view (larger version):
Street views
Street view one (larger version):
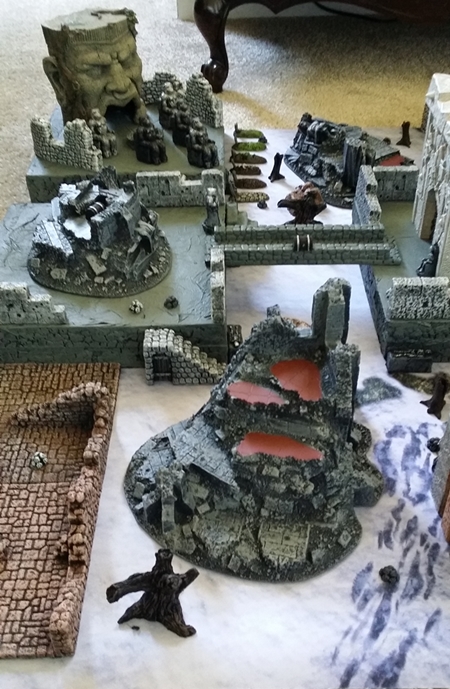
Street view two (larger version):
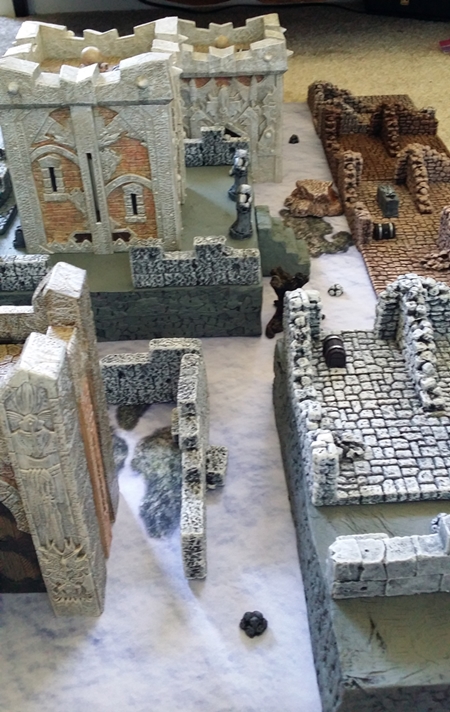
Street view three (larger version):
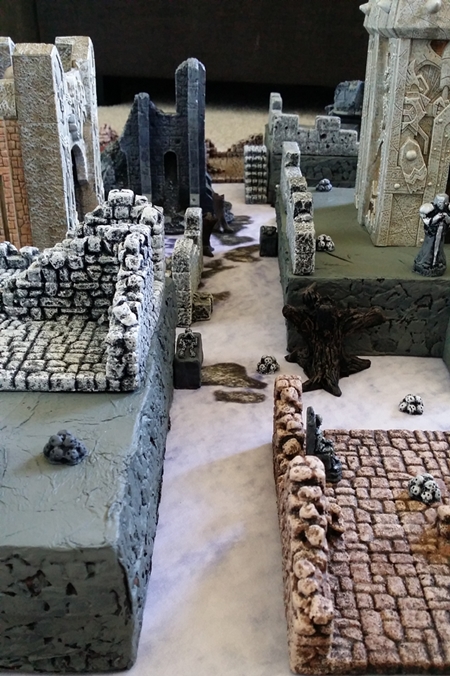
Street view four (larger version):
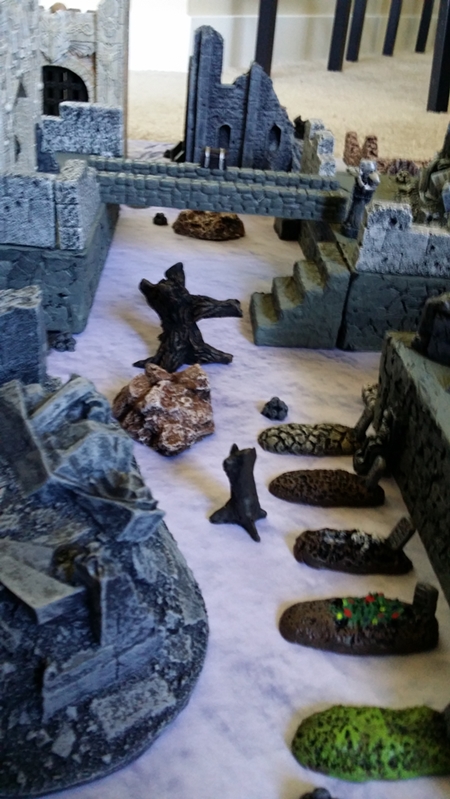
Looking at the photos, I can see a spot or two where I’ve got a sight-line over 24″, but I have plenty of stuff to drop in or move around to eliminate that. I assume it’s easier to police LOS during setup with two people looking at it, too.
Maybe it’ll feel different in play, but just messing around with it I’m happy with how my Frostgrave turned out. It’s crowded and death-y, with lots of elevation, and there’s plenty of variety to the terrain.
Terrain elements
Hold onto your hat! Here’s everything you see in the pictures above:
- F.A.T. Mat Alpine 3×3 (paid link): Holy shit are there a lot of battle mat options! But this one was my favorite by far. It’s basically a huge mouse pad, complete with a smooth-but-not-slick play surface and a neoprene bottom that makes it roll up smoothly, lay perfectly flat, and stay in one spot. The graphics are great, and I was surprised how big a difference this made over the piece of plain white felt I used in earlier incarnations. It’s worth it.
- Battlefield in a Box terrain (the irregularly shaped dark grey ruins): These are out of print, but they’re awesome if you can find them. I have Collapsed Corner (paid link), Fallen Angel, and Buried Monument, and I love all three. Collapsed Corner, which is the tallest and most impressive of the three, is the best value.
- LEN Design Concepts custom pieces (big grey squares, bridge, wide stairs): I was amazed how hard it was to find “hills” that don’t look out of place in a city, but this Etsy seller offers just the thing. I got in touch with him and asked if he could take the mossy green out of the paint job, and wound up buying four risers with fieldstone sides, a bridge, and two small sets of stairs as a custom order. They’re all prepainted, and the risers in particular are great for giving the city a much-needed “crowded streets” feeling. He was awesome to work with, too.
- Mage Knight Castle Keep (paid link) and Gatehouse (paid link): These are awesome! (Here’s my Yore post about them.) I’ve got two keeps and one gatehouse in my Frostgrave, and they’re one of the best values in prepainted terrain. They’re out of print too, but often available cheaply (at least for now).
- A big aquarium decoration (paid link): Aquarium stuff is an interesting option for prepainted terrain, but it’s often out of scale, expensive, or both. This huge head is perfect.
- War Torn Worlds terrain (smaller square ruins, walls, tiny rubble piles): They’re out of business and this stuff is tricky to find, it’s worth the hunt. It’s made of recycled tire rubber, and it’s tough and looks good. I have 8 Ruinopolis sections, a host of walls (curved, ruined, modern, and fieldstone), and a few rubble piles.
- Legendary Realms terrain (all the little stuff): This is my clutter — little resin bits and bobs scattered all over the place. (Here’s the Yore post about it.) I have large and small trees, graves, skull piles, seated skeletons, lizard god statues, stairs, knight statues, skeletons on slabs, 2″ bubbling pools, and wooden treasure chests. These folks are currently producing terrain, so for once I’m not recommending something out of production.
I’ve had a lot of fun writing about Frostgrave over the past few weeks, and I can’t wait to actually play it!
Hopefully this breakdown was helpful to you. Thanks for reading!
